
Example Facebook Page

One Funnel Away Challenge Review
How to create and optimize a Facebook page in 5 different steps
Why Facebook Page is so important and your page score at the back-end depends on the engaging content you create on the page. Most people overlook it by just creating some random posts on the
Page inconsistently. FB looks at how much value you are providing to the audiences and the FB algorithm at the backend calculates it by how engaging the posts are by the like’s comments and shares.
Or how long the video was watched if it is a video post.
Lets create a Page and see how easy it is but the optimization after creation takes some time, like adding additional details like your website the hours of operations. Adding your default message to the public, so that if someone sends a reply you can respond immediately and automatically with a default message
You can connect an Instagram account to the Facebook account, so that you can create Instagram ads along with the FB ads at the same time.
You can add blocked words list and upload it so that whenever spammers leave a negative message like spam or F$%$ word, it is blocked and does not affect your pages score.
The benefits of Facebook Page is that whenever someone likes a post on your page, they get shown future posts on their newsfeed, in that way you can continue engaging your audiences by meaningful posts
Step 1: Click on Page Creation Icon and Fill out the basic info
There are two ways to create
- Click on the Page Creation icon or
- click on the url https://www.facebook.com/pages/creation/
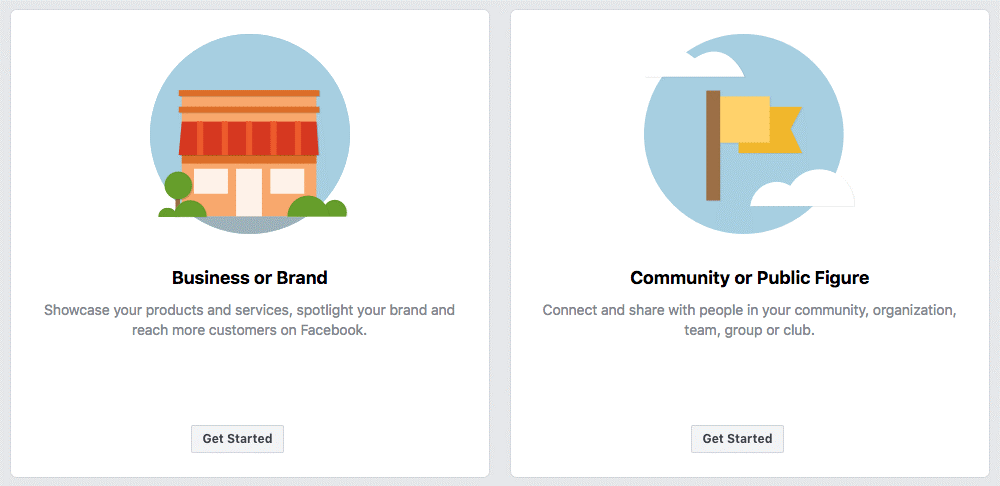
Pick your Page type, if it is going to be for a business like dropshipping please pick, business or brand.
If you are creating a community or a social page click on the community or public figure page.
“Business or Brand” and “Community and Public Figure
Step 2: Add Profile Picture and Pick UserName
Ideal size for FB profile picture is 180 * 180
Whenever you create a facebook ad this photo will appear with the ad
And also when youcomment on a post or publish a post.
Then Upload your FB cover picture, you can get create one in adobe spark or canva
The Facebook cover photo size is 820 pixels wide by 312 pixels tall on desktop.
Set your Facebook page username, username appears as your custom Facebook, your URL.
Preferably something that people would remember and that showcases your brand
Step 3: Enter the Information and follow the page tips
you can also “Settings” and “Page Info” to fill out your Page information. Here are the things to fill out:
- Description – Let people know what your Page is about in 155 characters.
- Categories – Categories can help people find your Page. Choose up to three categories.
- Contact information – If you have a business phone number, website, and email address, add them here.
- Location – If you have a physical store, share your address here.
- Hours – If you are only open on selected hours, state them here.
- More – You can even state a price range (if you want).
All of these details will appear on the About tab of your Facebook Page, where you can add even more information, such as your business’s story, awards, menu, etc.
Step 4: Customize your Page
Facebook allows you to customize your Page even further. In your Page settings, there’s a “Templates and Tabs” tab. This tab lets you configure how you want your Page to have and to look like.
Tabs are essentially different sections of your Page, such as your posts, your photos, reviews of your business, etc. You can decide which tabs you want on your Page and their order on your Page.
To make things easier for you, Facebook has several templates you can choose from.
Each template has a default CTA button and tabs (i.e. sections of your Facebook Page), which you can preview by clicking “View Details”. Here are the various templates:
- Shopping
- Business
- Venues
- Movies
- Nonprofit
- Politicians
- Services
- Restaurants & Cafes
- Video Page
- Standard
You can also customize (turn on or off and rearrange) the tabs of your Page, too. Here are the possible tabs:
- Offers – Lists current offers for your business
- Services – Gives you a space to highlight the services you offer
- Shop – Shows the products you want to feature
- Reviews – Shows reviews on your Page and allows people to write reviews
- Photos – Shows photos posted on your Page
- Posts – Shows your Page posts
- Videos – Shows videos posted on your Page
- Live Videos – Shows live videos about your page
- Events – Lists your upcoming events
- About – Lists information about your Page
- Notes – Gives you a space to highlight notes on your Page
- Community – Lists your friends that have liked your Page
- Groups – Lists the groups that you’ve linked to this Page
- Info and Ads – Shows ads that you’re running via the Page
Step 5: Invite Friends and Schedule Posts
Invite the friends in your friend list to like the page and share posts, Different roles have different priveileges
Admin – All access on the page, creation, modification and deletion
Editor – Can Create Facebook Ads and Can edit the Page, send messages, and post as the Page,
Promote the Facebook Page with friends and Facebook ads
If you don’t have a big enough friend list, you can always promote Facebook with Facebook ads. One of the campaigns you can create in Facebook ad is a traffic campaign, have the feature to send traffic to the website or blog post. It is an excellent source of quality traffic to promote your blog or website.
How to delete Facebook Page
Steps to unpublish and delete a Facebook page
- Go to your Page, click settings on the upper right corner.
- Select the Page Visibility Option and select unpublish the Page
- It will ask you for reasons why you are unpublishing your page, just select one reason
- Your Page will be unpublished.
- If you wish to republish your page then select publish again.


REMOVE A PAGE